(
(

POE Betrayal Slayer Sunder Starter Build - Fast, Cheap, Easy To Leveling

Sunder is the vital skill in this build. Sunder is a melee attack creating a wave that travels forward and damages enemies in a straight line.
This build completely immune to phys reflect enemies or maps. You can face-tank the entire Uber Lab in under 5 min’s while collecting keys and shrines along the main path. You can do this over and over and over again with basically no risk of death.
Quick Jump
Pros & Cons
Pros
- + Fast
- + Tanky.
- + Above-average DPS.
- + It's a Phys-attack build that can run phys reflect maps.
- + Completely immune to phys reflect enemies or maps.
- + The gear is absolutely cheap as chips to obtain.
- + Levelling is easy, as is the final Kitava kill without the need for Twink quality gear.
- + You can face-tank the entire Uber Lab in under 5 min’s while collecting keys and shrines along the main path. You can do this over and over and over again with basically no risk of death.
- + Uber-Lab faming will make you filthy rich in a number of different ways, all through the length of a season. Then back in standard mode, too. This is applicable even in 7-day+ race leagues, too.
Cons
- - This is not a Guardian-stomping mega-DPS build. You can clear the Guardians and Shaper deathless with a good understanding of the boss mechanics over the course of 2-4min’s, but most casual players will die at least once or twice in those encounters, especially in they have lower level/quality gem’s, or attempt to completely face-tank the fights.
- - It’s not as fast as wand builds because It doesn’t have 600% movement speed. It’s still very fast none the less though.
- - It’s not as completely screen-shattering as the 1-shot trash clearing mega-AOE-sized Kinetic Blast builds. It still clears trash very fast none the less though.
- - The DPS drop’s off noticeably against T10 map bosses and above. It’s not like you can’t kill them, it’s just more like the bosses go from taking 1-10 seconds, to around 30-90 seconds. Bosses with "phases" in their fights are a complete pain in the ass sometimes due to your life-leech effect wearing off. Having said that though, they are still easy to kill deathless, they just take more time.
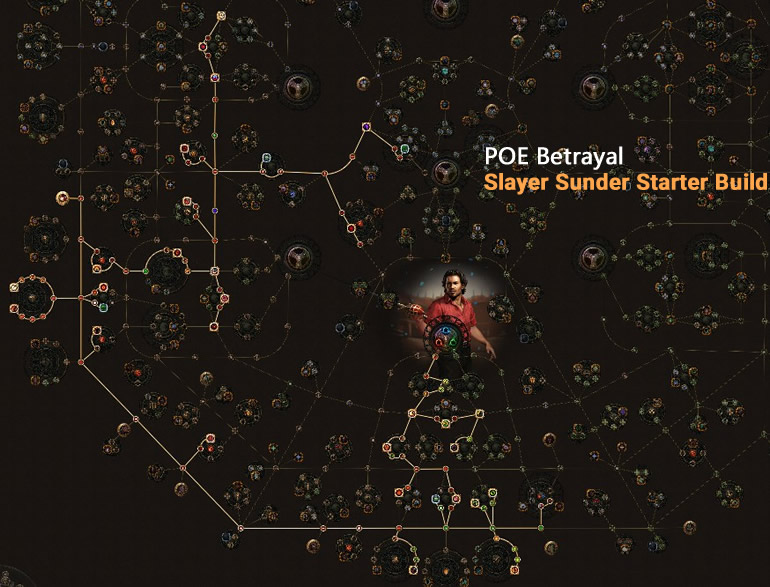
Skill Tree
Ascendancy
1. Headsman (Do at Level 35-40)
2. Bane of Legends (Do at level 55-60 once the Act 6/7 lab trials are complete)
3. Endless Hunger (Do at Level 68-70, once the lab trials in Act 8/9/10 are complete)
4. Brutal Fervour
Basically it's up to you the order you do these in. 1 and 2 give huge boosts to your DPS, area of effect and attack speed.
Bandits
Help Oak for the Phys Damage Reduction, Life Regen and added Phys Damage.
Pantheons
Take the Soul of the Brine King major and Soul of Garukhan minor. The minor choice is up to your own personal preference ultimately.
Passive Tree
Gems & Gear Setup
Helmet
The Bringer of Rain Nightmare Bascinet
- L5 – Ruthless (R)
- L12 –Sunder (R)
- L18 - Concentrated Effect (B)
- L38 – Multistrike (R)
Weapon
Wings of Entropy Sundering Axe (Can use at Level 60)
- L10 - Leap Slam (R)
- L24 – Punishment (R) or (L24) Warlord's Mark (R)
- L31 – Fortify (R)
- L38 - Curse on Hit (B)
Armour
In order to use any chest with this build for gem levelling once you have the Bringer of Rain Helm, you’ll need to take off the helm first, then equip your chest, then put your Bringer of Rain Helm back on. Otherwise it will block you from equipping the chest.
Belt
Anything with +60 Life, +60 to Dual or Tri-Resistances, then if you’re lucky, any rolls with Phys Damage and Dex/Int rolls are also great (not needed, but are helpful).
Gloves
Anything with an armour base and +20 Dex, +50 Life & +60 to Dual or Tri-Resistances
- L5 - Chance to Bleed (R)
- L8 – Maim (R)
- L18 - Melee Phys Damage(R)
- L28 – Ancestral Warchief (R)
Or
- L5 - Ruthless (R)
- L18 - Concentrated Effect (B)
- L18 - Melee Phys Damage (R)
- L28 - Vaal Ancestral Warchief (R)
Boots
Atziri’s Step Slink Boots (Can use at Level 69)
- L16 – Blood Rage (G)
- L16 – Arctic Armour (G)
- L24 – Hatred (G)
- L34 – Summon Stone Golem (R)
Ring 1&2
Anything with +40 Life, +60 to Dual or Tri-Resistances, then if you’re lucky, any rolls with Phys Damage to Attacks and Dex/Int rolls are also great (not needed, but are helpful).
Amulet
Carnage Heart Onyx Amulet (Can use at Level 20)
Flasks
- The Writhing Jar Hallowed Hybrid Flask (Or a Seething/Bubbling Life Flask).
- Rumi’s Concoction Granite Flask. (Or a standard Granite flask is fine, too)
- Atziri’s Promise Amethyst Flask. (Or a standard Amethyst flask is fine, too)
- Quicksilver Flask (Freeze/Frost Immunity, “+ Max Charges”, or whatever else you’d like).
- Stibnite Flask (Immune to Curses, Removes Curses).
Map Mods
Map Mod’s It Can’t Handle
- Cannot Leech Life (T11 maps and higher)
- No Regen (T11 maps and higher)
Map Mod’s It Can Handle
- Everything else.
Map Mod’s That Are Annoying
- Burning Ground (Can kill your FPS due to a bug in the game and makes things look choppy as you move around).
- Temp Chains (You move everywhere via Leap-slam so that’s not the issue, what is annoying though is trying to collect the loot explosions with negative movement speed applied on your character).
- Elemental Reflect (You can survive easily due to general life regen and life leech, but you just have to attack enemies at a slower rate and allow the Ancest Warchief totem to do damage for you as well, so you don’t get 1-shot by the reflect damage coming back off massive groups of enemies exploding at the same time).
Leveling
L1 - Head into town after the first initial boss killed during the intro and then take the cleave attack gem right away if you don't already have it. Socket it in an axe immediately if possible. If you are lucky enough to score a 3-link axe early, add in the Ruthless and Chance To Bleed gem's if it's a 3-red socketed axe (It will be a 1-handed axe, because 2-handed axe don't start dropping until Level 4 or higher zones).
Switch over to a 2-handed axe as soon as possible (you can't equip one until you are at least Level 4) for the extra DPS. Now keep it and only upgrade to other 2-handed axe's that have the correct colour and linked sockets on them that you need. You can do this easily by just picking up the white normal 2-handed axes that are linked and have the correct colour sockets you need. The only stat rolls you need are Phys Damage, attack speed or “+ Level of socketed gems”. You can simply just apply a Transmute Orb to make the axe magic, then apply an Augmentation orb to give it a second magic stat roll. If you don't like the rolls, use orb's of alteration on it till you get a stat roll or two that you do like. Do the same for the rest of your items as well.
L3 – Take the quicksilver flask as a reward and equip right away. Equip 3 of them with 1 health flask and 1 mana flask if possible (you can do this by creating 2 mule characters and running the first couple of missions to get the flask reward, then just equipping the extra 2 flasks on your actual character).
L5 – Take the ruthless support gem and put it in your helm, linked to Cleave if possible.
L5 - Take the Chance to Bleed support gem, slot it in your gloves.
L6 – Collect two 1-handed axe’s, each with 3 sockets on them (they don’t need to be linked) and place them in your alternate weapons slot. You can use these to level up alternate gems to sell later on.
L8 - Take the Maim support gem
L10 – Take the Leap Slam gem and now use this for your movement ability. Slot it in your weapon.
L12 – Take the Sunder gem now as soon as possible, using it instead of Cleave. Slot it in your helm.
L16 – Take the Blood Rage gem and slot it in your boots.
L16 – Take the Arctic Armour gem and slot it in your boots.
L16 – Take the Enduring Cry gem and slot it in to one of your two 3-socketed 1-handed axe’s in the alternate weapons slot. You just level this gem as an optional extra skill to use later on from L45 onwards, when if a Unset Ring drops that has good stat rolls on it, you can equip this skill in it and use it to gain endurance charges quickly while levelling.
L18 – Take the concentrated effect support gem and slot it in your helm.
L18 - Take the Melee Physical Damage support gem, slot it in your gloves.
L20 – You can now equip the Unique Carnage Heart amulet from any point onwards.
L24 – Take the Hatred gem and slot it in your boots.
L24 – Take the Punishment support gem and slot it in your weapon.
L28 – Take the Ancestral Warchief gem, slot it in your gloves.
L28 – You can equip the Brightbeak unique weapon now in alternate weapon slot #2 from any point onwards.
L31 – Take the Fortify support gem, slot it in your weapon.
L34 – Take the Summon Stone Golem gem and slot it in your boots.
L38 – Take the Curse on Hit support gem, slot it in your weapon.
L38 – Take the Multistrike gem and slot it in your helm.
By the time you reach a lowly Level 38, you hit the milestone of being capable of equipping the entire build's skill and support gem's in your levelling gear. The game starts dropping 4-link possible gear (ilvl 25+) at L25 as well, which to be precise is "The Slums" in Act 3 and then any area/zone further on past that. So by L38 you have everything you need in all the correct types of gear and linked fully, with relative ease, which is one of the reasons that this build absolutely smashes through the levelling stages so easily.
L53 – You can equip the Prismatic Eclipse unique weapon in the alternate weapon slot #1 from any point onwards.
L60 – You can equip the unique Wings weapon from any point onwards.
L67 – You can equip the unique Bringer of Rain helm now from any point onwards.
L68 – You can now equip the Rumi's Concoction and Atziri's flasks from any point onwards.
L69 – You can now equip the unique Atziri's Step boots from any point onwards.
You can drop your mana flask when levelling at around Act 8 to 9 when your around L61, when you take the Shaper Node in the skill tree. The 40% increased mana regen rate you get from it should see you through from that point onwards easily without mana issues.
As for Twink unique levelling items….. they really aren't even needed. But as far as what's on offer cheap in the first couple of days of any season or race to help speed things up a little, the Reapers Pursuit (L33) and Blood Reaper (L45) are weapons each costing 1-alchemy orb. Unlinked Ashrend and Bramblejack chests are also usually about 1-ach each. As for gloves and boots – whatever floats your boat. It's unlikely any will be better than just having a pair that contains all your linked skill gems. You can check and see on poe trade if anything you like is available at the time for a minimal cost.
A note about which axe level bases to skip using while levelling – the ilvl 36 "Dagger Axe" and ilvl 59 "Talon Axe" both have a 50% increased Crit Chance already on their base. You may want to avoid these as we take the Resolute Technique skill node on the tree fairly early, which means our hit's never crit and this stat roll will take one of the possible stat roll positions that we want to roll on the axe.
Expectations & POB
POB link
- The base "Wings of Entropy" 2-hand Axe version: https://pastebin.com/d6a7hKyR
- The "Sinvicta's Mettle" 2-hand Axe version: https://pastebin.com/3SXuJWBZ
- The Doomsower 2-hand Sword version using Vaal Double Strike: https://pastebin.com/BhHzSFv4
Dec
POE Betrayal Trickster Toxic Rain Starter Build - Cheap, Safe, Fast Recharge, Endgame
Toxic Rain will play an important role in this build and combined with other skills, it will show a great power. This build cheap to start, cheap to invest in upgrades, scope for further investment. Start levelling for 3C; all yellow maps on ~75C and mandatory uniques are very cheap. Flexible about others.
Dec
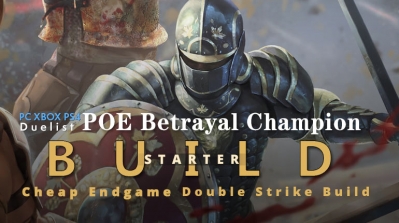
POE Betrayal Champion Double Strike Starter Build - High DPS, Low Budget, Endgame
Double Strike is the main skill that is used imelee weapon. Combined with other skills in this build, it will exploit its power fully in the game.n this build. Double Strike is a melee attack that performs two fast attacks on a target enemy with the player's main hand

Dec
POE Betrayal Raider Molten Strike Starter Build - Easy, Cheap, Tankly, Endgame
Molten Strike plays an important role in this role. Molten Strike is an attack skill consisting of two parts: an initial melee attack hit and a projectile attack. This build is easily started at the beginning of league and starts out cheap and powerful with extreme end game scaling available with investment as the league goes on.
Dec
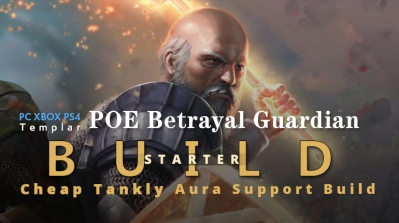
POE Betrayal Guardian Aura Support Starter Build- Cheap, Tankly, Endgame
In this build, Aura Support will be used to show the power of Guardian. This build will form a tanky character with less investment and easy starter. If you play with your friends, it will help you have a enjoyable experience.
Dec
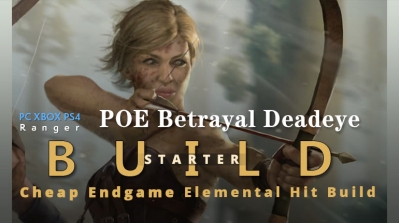
POE Betrayal Deadeye Elemental Hit Starter Build - Cheap, High DPS, Endgame
Elemental Hit is an attack skill, executing a basic attack with added damage of a random element. An Elemental Hit may be performed with any weapon. Combat Focus now causes Elemental Hit to deal 50% less damage of the prevented element, including damage that gets converted from the prevented element to a new element. This build need a low budget, and it will cause an impressive damage. A good choice for novice players.
Dec
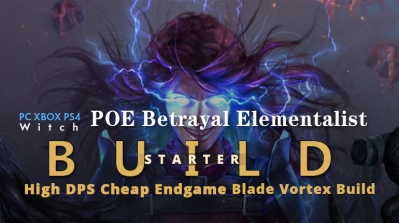
POE Betrayal Elementalist Blade Vortex Starter Build - Good Clear Speed, High Damage, Cheap Gear
This build is based on Blade Vortex. Blade Vortex (often referred to as BV) is a spell that creates an ethereal blade that spins around the caster that deals physical damage, each blade lasting for the minimum duration of 5 seconds.